Showing posts with label Tutorial. Show all posts

Wednesday, December 31, 2014

Happy Birthday Kendra!!!

Hi everyone!  Today we as a team are honoring one of our leaders, Kendra from Kendra's Card Company.  She is a super sweet lady and is full of fun and inspiring inspiration for every style of card crafter.  Today we (Crafter's Companion DT) want to wish her a very Happy Birthday!!  She is one of the most organized people I know and has a eye for design.  I hope you have a great day Kendra! You deserve to relax and have fun!!!  No working allowed!

I have created a card using the Crafter's Companion Embossing folder called Make A Wish.  I used the embossing folder stamping technique which can be found in the video below.  I shot the video late spring and it was a technique I featured for Crafter's Companion.  It is really easy and makes for a quick card with stunning results.  Hope you all like it.


I used Sentimentals EZMount Stamp Set- Imagine for my sentiment.  Twill Chevron Black and White Ribbon from Really Reasonable Ribbon too!


Check out the tutorial on how to create this technique on your next Crafter's Companion card!


Here is a line-up of all the design team members wishing Kendra a Happy Birthday!  Hope you have time to hop with us!  There will be prizes to be won too!

Lori Barnett
Taylor Usry
Tenia Nelson
Giovana Smith
Melissa Cash
Chrissie Tobas
Wendy Price
Trena Brannon
Swarup Murthy
Jenn Cochran  <<<======You are HERE
Roxanne O'Brien
Christiana Reuling
Follow on Bloglovin

Wednesday, March 19, 2014

Ombre Inking

Hello friends and fans! Today I have a cool background technique.  You know that cool hair technique that may or may not still be in style depending on where you live?  The one that goes light to dark or dark to light?  Well, I will show you in my below step out tutorial how to create an ombre background and how it is finished off with a stand out bow made with Really Reasonable Ribbons Satin Swiss Dots Ribbon in Hot Pink.


1. Gather your supplies.  Today I am using the clouds  and sentiment from Fairy In Flight (clear), Versa Mark Ink, embossing powder and Memento inks in 3 shades of the same color.  
2. Stamp the clouds on a 3.75" x 5" piece of paper.
3. Sprinkle on the embossing powder and emboss with a heating tool.
4.  Start with your darkest shade of ink and dab color onto your embossed image in a line down your paper.  Move on to the next lightest color of ink and do the same but overlap with the dark ink.  Finally use your lightest ink and follow the same technique.
5.  Finally take a baby wipe and remove the ink form the embossed image.
Now your background is ready to embellish with the Satin Swiss Dots in Hot Pink from Really Reasonable Ribbon and make into a card.  My card-base is 4.25"x 5.50".


Hope you liked this technique.  Thanks for joining me today.

Follow on Bloglovin

Monday, October 14, 2013

Technique Lovers Halloween Treat Purse


Hello Jax Bean Stalks followers and friends!  Today I have a purse tutorial...but it is not your typical Coach Purse or Louis Vuitton!  It is a simple trick or treat purse I made my son Bean.  I will be adding to it an adorable glass scull and crossbones necklace.  I will have the necklace tutorial later on this month.  


If you love the look of my trick or treat purse, you can make your own by following my simple tutorial below.  All you need to start out is an 8.5 X 11 piece of cardstock and a score board.


On this 8.5 x 11 sheet of cardstock score on all lines.  The light orange highlights is where you will need to place your adhesive or glue once you have folded all your scored lines. This will eventually turn into a cute little treat purse.  My inspiration came from TLC 211 at Split Coast Stampers.


1. This is what your treat purse should look like after you score all lines.

2. Here is what it looks like with the center starting to take shape.
3 This is what it should look like after you glue the orange shaded areas from picture one.
4. To create a handle I choose a scrunchy elastic ribbon. I cut 2 pieces 6" long, Also cut 2 pieces of paper 3/4" x 4.5". These will be used to cover the area where you adher your ribbon to the main part of the purse. In this step you can see where I added my ribbon with double sided adhesive then I take one of the paper strips and adhere it over where I have attached my ribbon.
5. I have attached Velcro in the center on the inside of my treat bad. This will keep it closed. You can also use a brad, magnet, punch holes and pull ribbon through and tie to secure it closed. Anything you have would work fine.


Here is what the finished purse looks like without decorations.  I think it would make a great jewerly box for any occasion.  Or you could fit an 8oz M&M... or any other small candy!


My image is colored for the Color Me Creative Challenge.  This week our challenge is anything goes.  Hope to see all of you who enjoy coloring there!


I love the papers and decorations.  All of my cardstock if from The Paper Parade.  Our current challenge is Halloween.  So pop on in and show us your creations.


Thanks for visiting.  If you decide to make this cute little purse.  Please enter in my challenge at Split Coast Stampers.  TLC451~Revisited TLC211 Treat Purse with a twist


Supplies:
Image: Bugaboo
Ribbon: Really Reasonable Ribbon
Paper: Glitz
Copics:
C-3,5,7
BV-01,04,08
YG-00,03,25
Y19
YR07
Follow on Bloglovin

Friday, June 28, 2013

Ribbon Carnation

Hello friends and followers of Jax Bean Stalks!  I am so excited to show you my tutorial today.  I was playing with Wire Woven Chevron Striped ribbon black/white and thinking how could I make an embellishment other than a bow with this fabulous wired ribbon.  So I was like "flower?"...ok...but I want something different than any old flower.  This is what I came up with:  I am sure someone else has already come up with this fun Carnation flower....but I have to honestly say, I have not seen one!


1.  First I started off with accordion folding the Wire Woven Chevron Striped Ribbon black/white .  
2.  Then I adhered it to a 2 3/4" cardstock black circle.
3.  I then repeated step 1 and adhered the accordion ribbon partially to the cardstock circle and partially to the 1st layer of ribbon with Helmar Professional Craft Glue.
4.  Repeat step 1 and 2 again adhering slightly to the last row of ribbon.  I then spiraled the ribbon to the center creating a little "nest" for my rhinestone.  
5.  Ta Da!!! Ribbon Carnation!

Hope you enjoyed my tutorial.  Here is what is looks like on a finished card.  Again I used the Wire Woven Chevron Striped Ribbon black/white. My Image and sentiment is from SP and Company Stamps.  It is called "Built for Two mini stamp set".  


I embossed the bicycle to look like a chalkboard.  The paper is EP.  


Here is a close up of the finished carnation flower.


Thanks so much for stopping by today!  I hope my tutorial inspired you!

Supplies:
Adhesive: Helmar Professional Craft Glue
Paper: EP


Follow on Bloglovin

Friday, March 8, 2013

The Language of Friendship-PPRS

Good morning Jax Bean Stalks friends, fans and followers.  Today I have a fun altered coaster tutorial.  Perfect for a friends birthday, or maybe even a teacher gift.  


The coaster I used in this tutorial has a finish so I primed it.  But if you are using a pressed paper coaster from a local eatery, then you can skip step 1.

Hope you all will try this fun and easy gift idea!  


Hope you enjoyed this tutorial!  


Photobucket

Wednesday, April 4, 2012

Hambo Hoedown- The Paper Boy has put Extra Folds in my paper!

Good morning Hoedown friends and stampers!  Today at the Hambo Hoedown we are experiencing extra folds in our projects...So to enter you will need a Hambo image (HERE)and a project with lots of folds!!  I Have a couple of different cards using the same image, papers, and products.  I have used the Paper Boy from Hambo Stamps in both.  I am also going to show you how to make one of the ever so popular rolled flowers you are seeing everywhere.

Here are my cards with the completed rolled flowers:
This is a pocket card...right behind the ribbon you can stick a gift card!


1.  Cut out the Royal Rose (MFT-Die-namics)
2. Turn over and spray generously with Donna Salazar's Collection -Silver Foil.  Notice the white Royal Rose on the Color Catcher is now a shimmery Silver Foil (see Results after spray pic.)
3. Let dry completely...about 5-7 minutes.


To get a good tight secure rose, I use a paint brush to "roll" my Royal Rose.  I roll towards the pattern which will allow the pattern to be on the inside and the Smooch Spritz side to be on the outside.  
Secure with a pop us glue dot.

I used different colors of Color Box pigment ink to edge the sides of all of my papers.  

I sponged my sentiment with Boyseberry.  A limited edition Color Box Pigment Ink.

I finally sprayed the entire card with Donna Salazar Collection Smooch Spritz-Vanilla Shimmer

All in all, I really like the amount of sparkle the Smooch Spritz gives your project.  It allows you to give a really unique element to your projects that you really cannot achieve with other products.  The Color Box pigment ink is fabulous for blending on, sponging and edging your paper products.  

You can find all of these products I have used at http://clearsnap.com.  You can specifically find the Smooch Spritz Here at one of the many recommended sites and stores.  For more fabulous ideas from the Clear Snap family please visit their blog http://clearsnap.blogspot.com

Products used:
Hambo Stamps: Paper Boy
Smooch Spritz- Silver Foil, Vanilla Shimmer
Color Box Pigment Ink
Memento Ink
Copics
K&Co. Paper
Ribbon
Acrylic dot (center of flower)
Royal Rolled Rose-MFT
Glue Dots


Photobucket

Tuesday, July 12, 2011

What is your favorite technique?

Color Me Creative Challenge Group


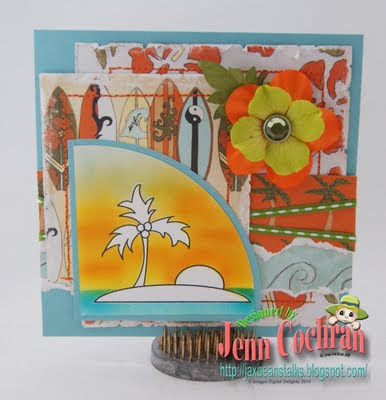
This week at the Color Me Creative ning we are having a really cool challenge! Show us your favorite technique. My favorite technique is airbrushing with my copics. So, for my post today I will do a tutorial on airbrushing a sunset. I have used a digi from our sponsor this week...Tiffany Doodles!

This is 12 steps to Airbrushing a sunset:


COPIC RECIPE
B 32
BG 02, 05
Y 15, 19, 21, 38

Paper:  Theresa Collins
Digi: Tiffany Doodles
Extras: Copics, Prima Flower, ribbon, brad, thread

Photobucket
Related Posts Plugin for WordPress, Blogger...

ShareThis